This guide walks you step-by-step through reviewing and completing a customer KYC workflow - from verifying identity and collecting financial/source-of-wealth evidence to performing risk checks. It shows exactly where to navigate and which actions to take (notes, attachments, logs, matches, relationships, billing), so your record management stays consistent, compliant and auditable.
On this page: Watch the video · Step-by-step guide
Download a copy: Reviewing an Individual KYC - Step by Step - KYC-09 (PDF). The complete easyAML Platform User Manual (July 2026) (PDF) is also available.
Step-by-step guideJump to: Summary & contact updates · Identity verification · Enhanced CDD - Source of Funds / Wealth · Risk matches - sanctions, PEPs, adverse media · Notes, logs, attachments & questionnaires
Summary & contact updates
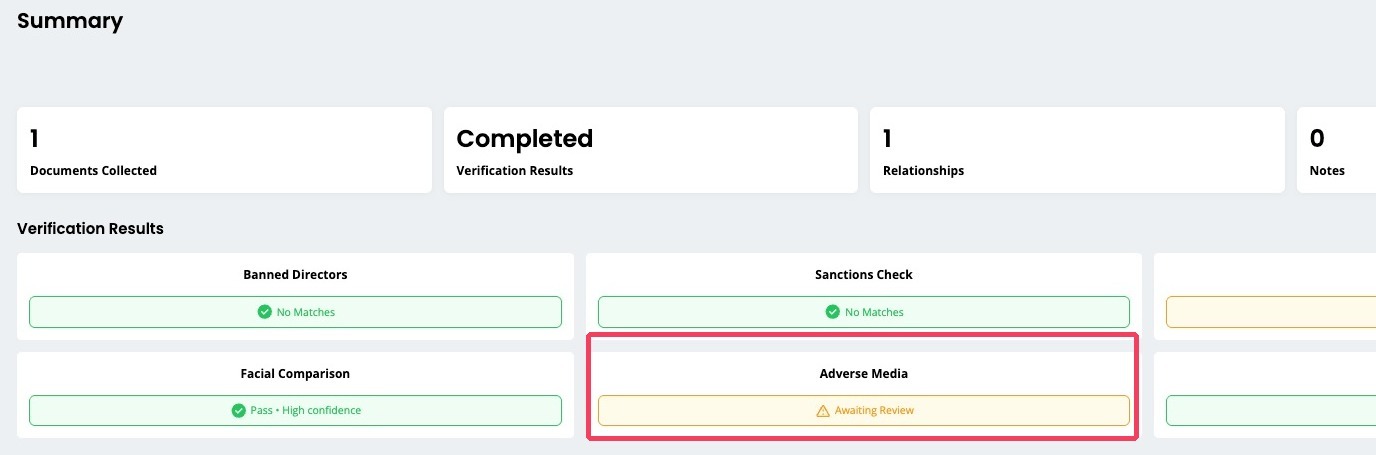
1. Open the individual's record. You land on the Summary tab - a one-screen snapshot of the review: documents collected, overall verification status, relationship count, and the automated check results (banned directors, sanctions, PEP, facial comparison, adverse media, online fraud). Use this as your starting point to see, at a glance, what has cleared and what still needs attention. The top section remains visible on all sub-tabs.
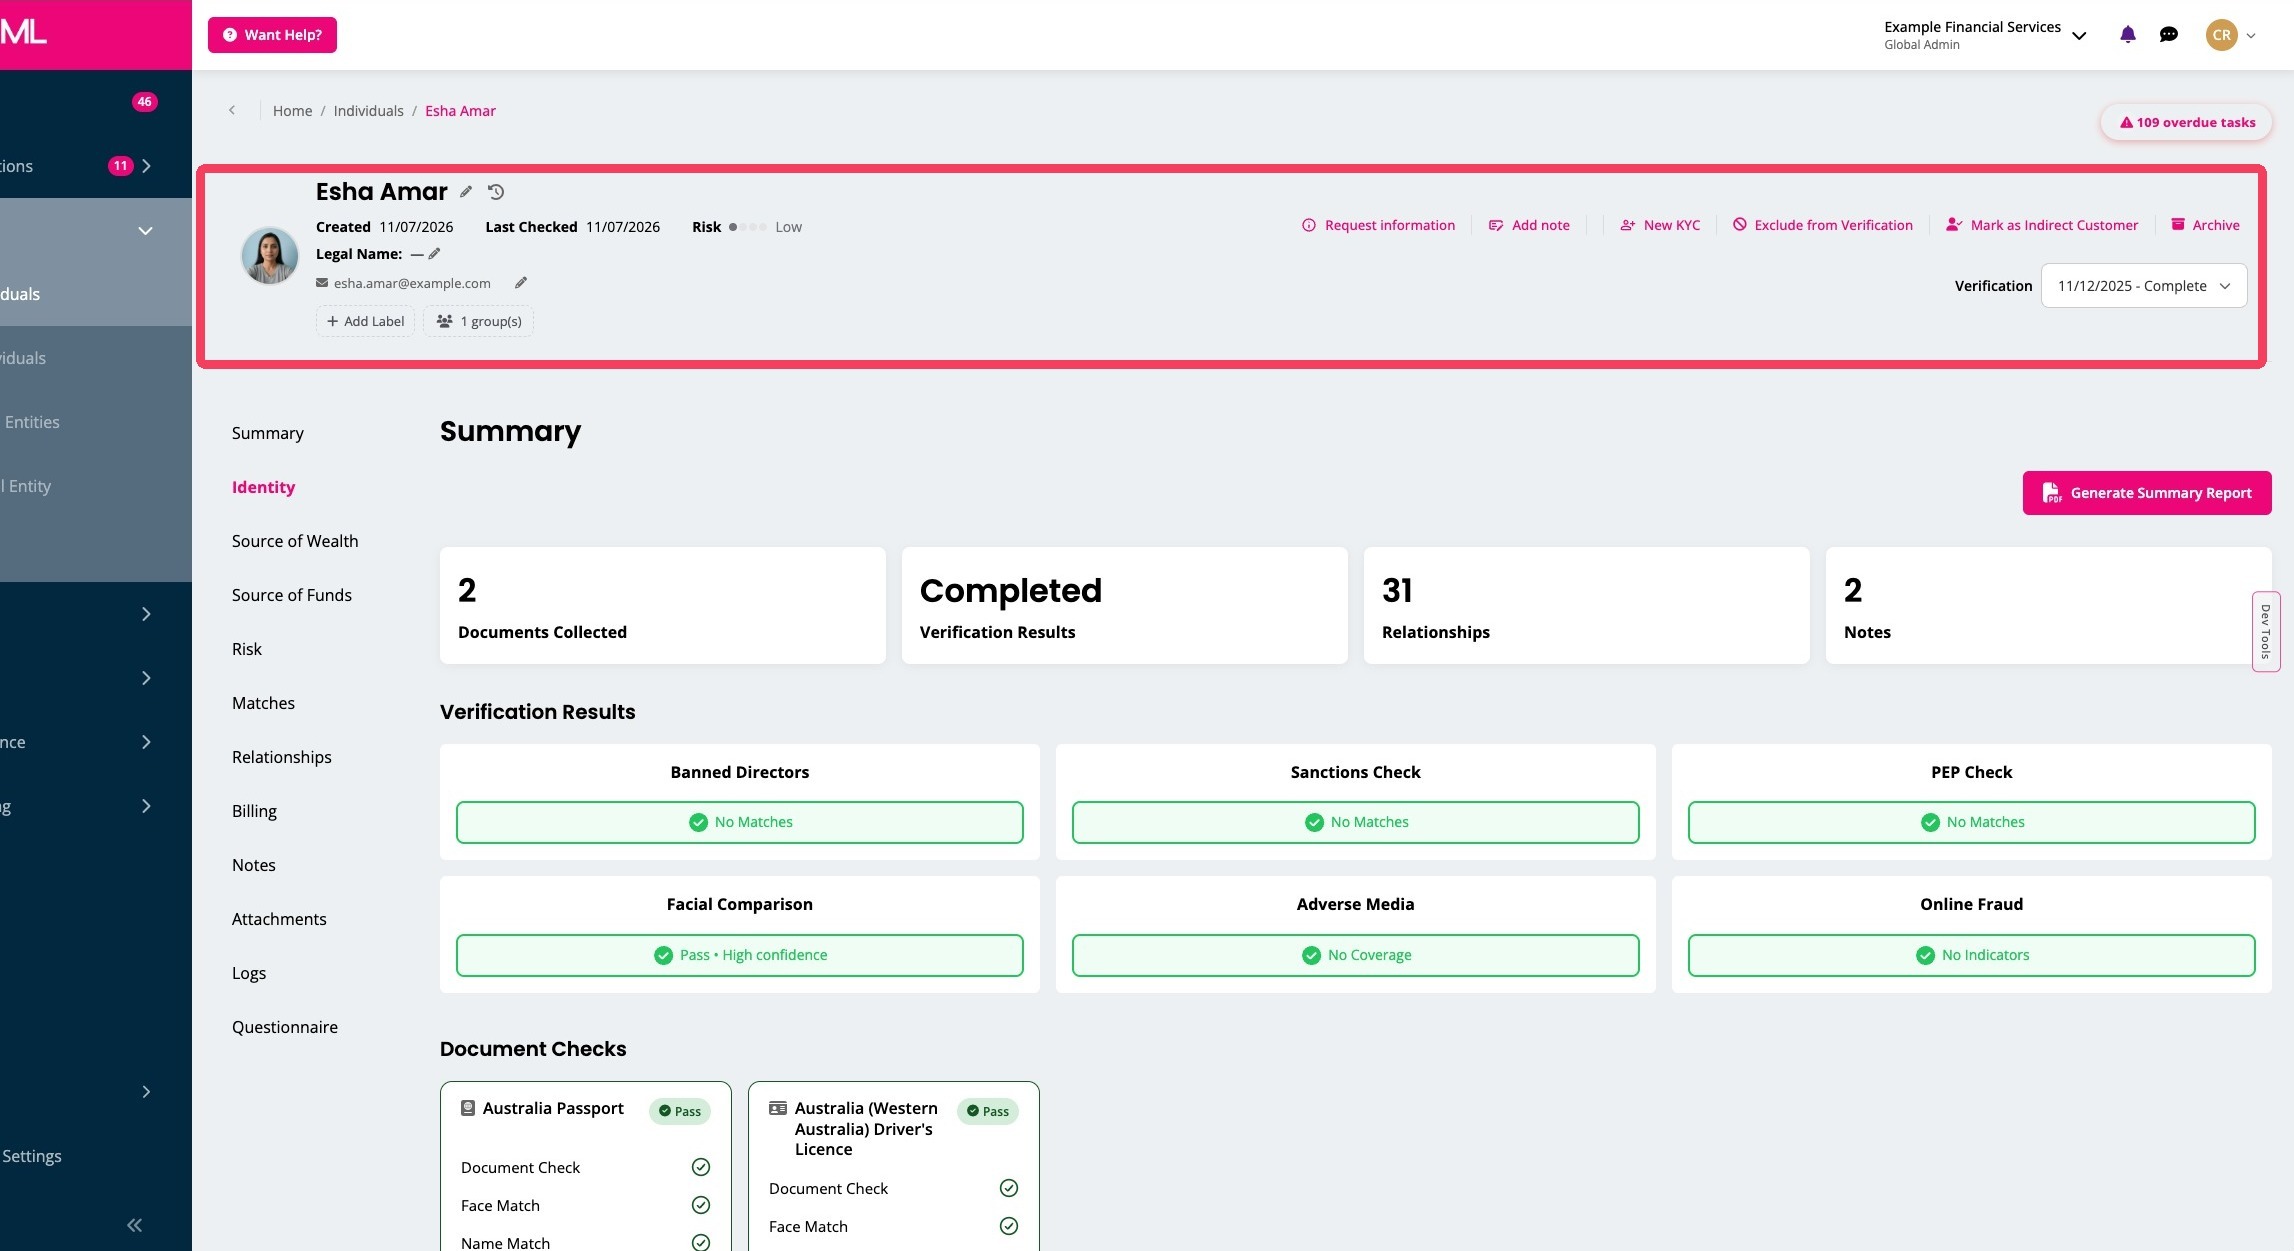
2. To check or update the person's name or contact details, click the edit (pencil) icon next to their Display name, Legal name, mobile and/or email in the record header. Accurate details matter here - they determine name matching and where VOI links, evidence requests and questionnaires are sent. You can also apply a Label or add the record to a Group.
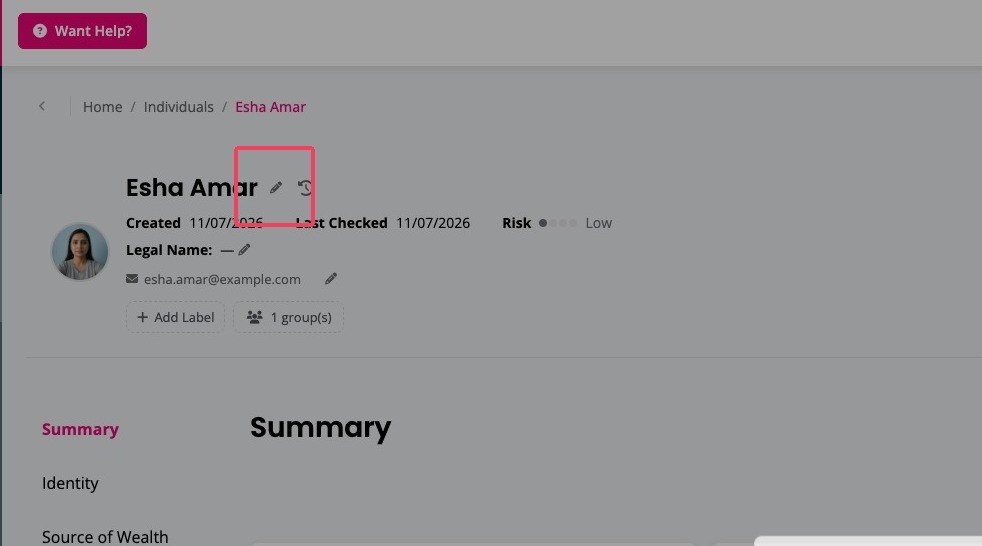
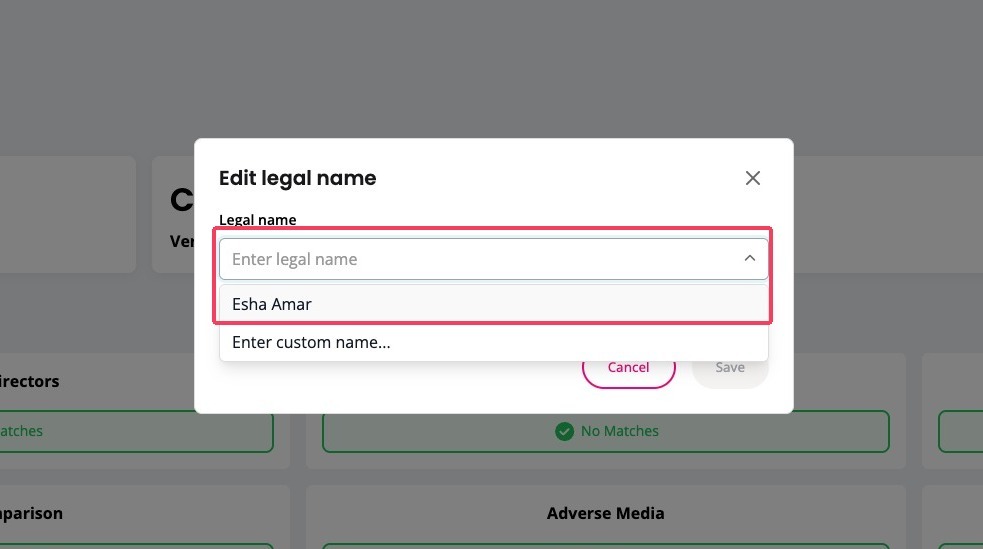
3. Clicking the pencil next to the Display or Legal name opens a pop-up showing the current Display or Legal name (these can be empty). Click it for a dropdown list - to change the details, click 'Enter a customer name…'.
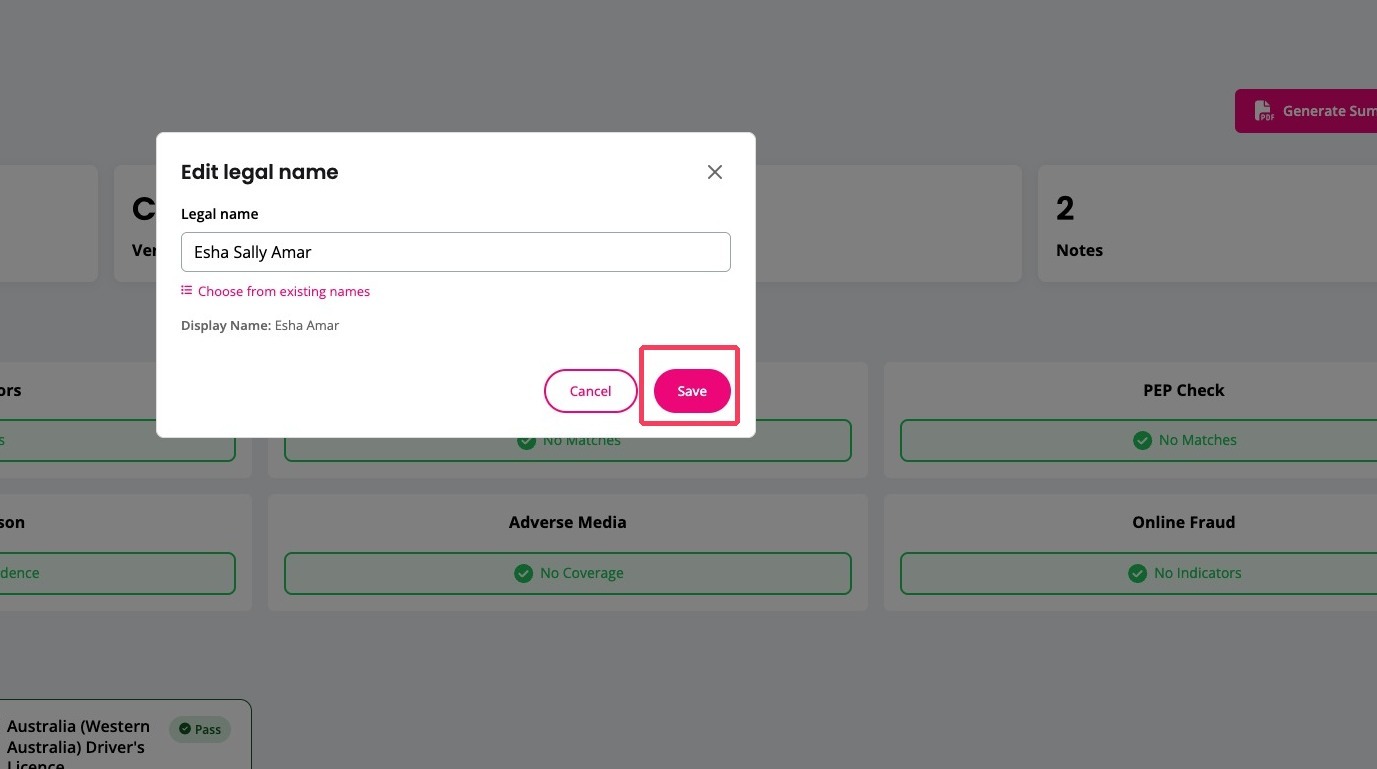
4. Enter the new Display or Legal name and press Save. Note: while changing a display name is common (e.g. Tony instead of Anthony), it is not generally recommended to change a Legal name unless it is clearly incorrect.
5. To add or change the client's mobile number or email, click the pencil next to the displayed details.
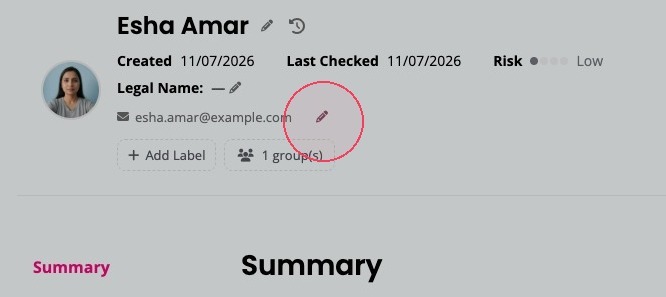
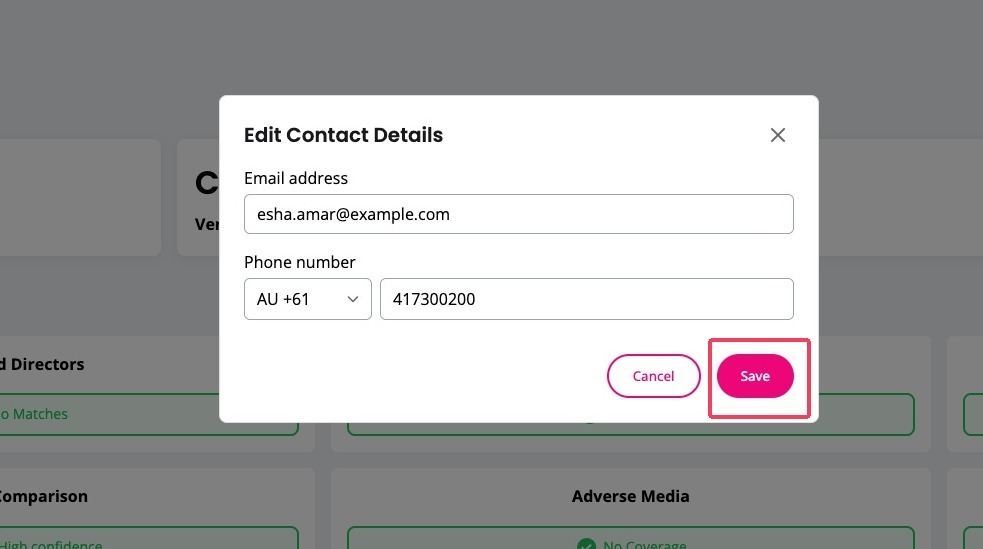
6. Enter the changes and click Save.
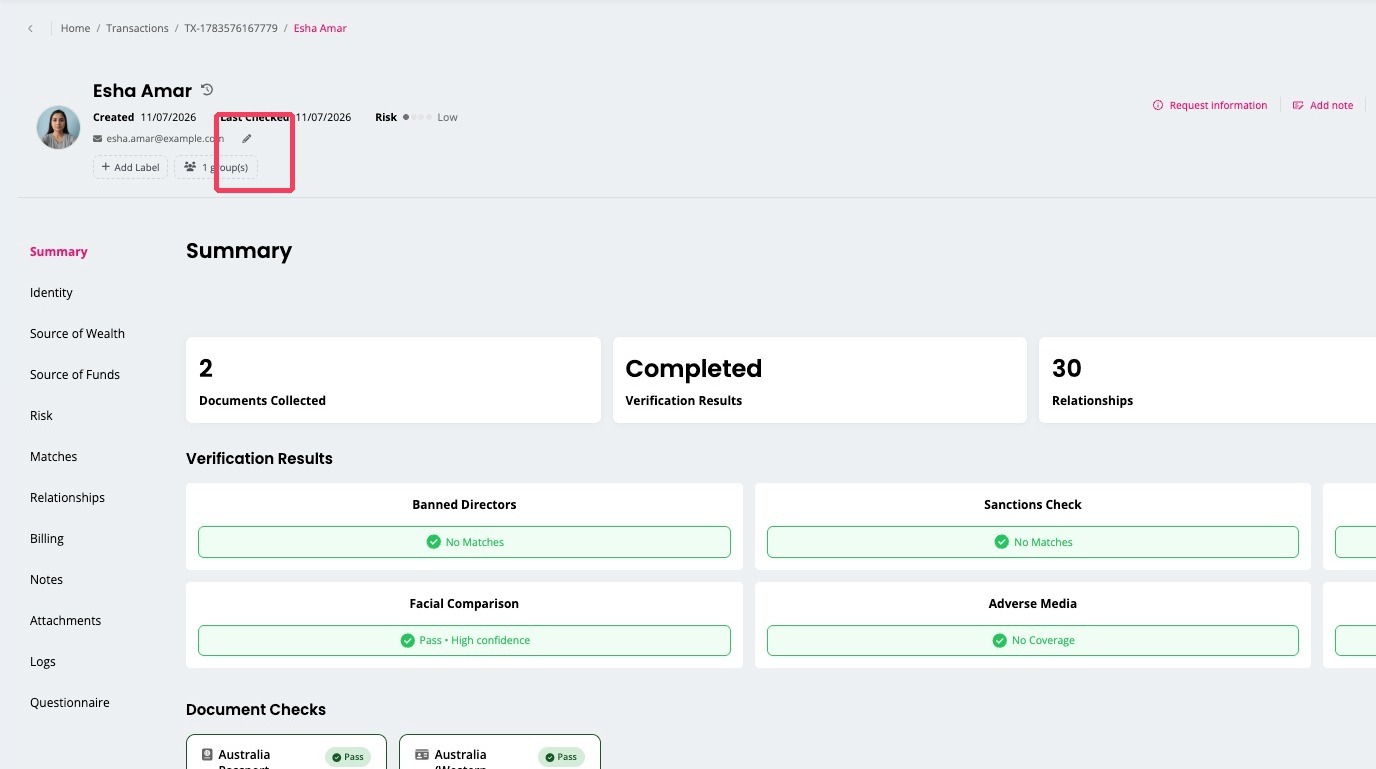
7. The same pencil edit is available from the record header wherever the individual appears (for example within a transaction), so you can correct contact details at the point you spot the issue.
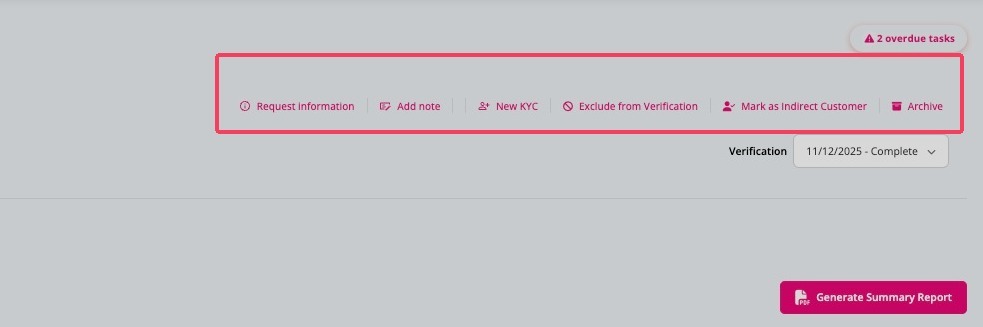
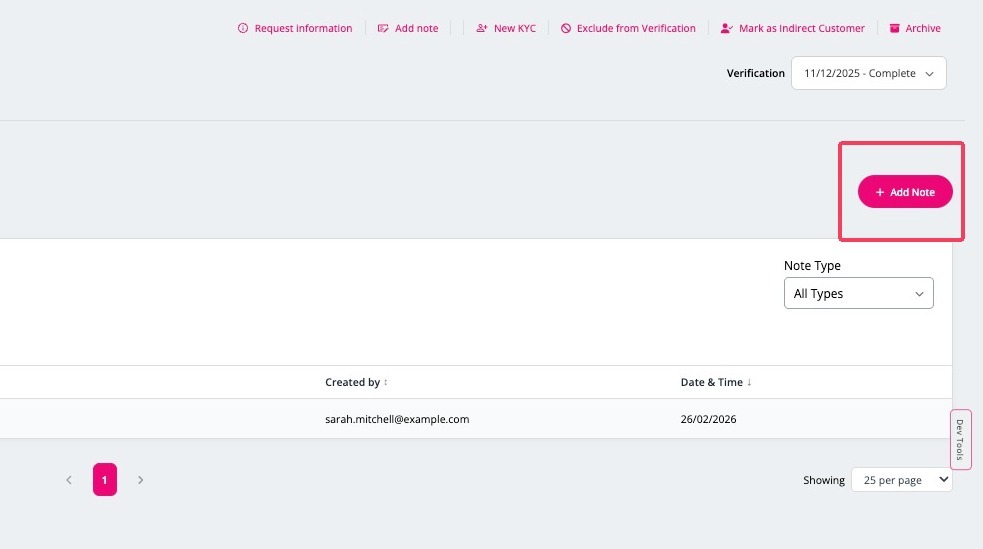
8. On the right-hand side of the top panel you can also press the links to:
- Request information - if you need further information for due diligence
- Add note - file notes, stored in the Notes section below
- New KYC - if you need to re-verify a customer's KYC
- Exclude from Verification - if this customer doesn't need KYC
- Mark as Indirect Customer - if this individual is not directly a customer for AML
- Archive - remove the individual so they are no longer visible
9. Any result marked for review can be opened for detail. Click the Adverse Media card (or any check card) to expand the underlying match data and the document-level checks - for example the driver's licence showing Document Check, Face Match and Name Match outcomes - so you can satisfy yourself the result is sound before relying on it.
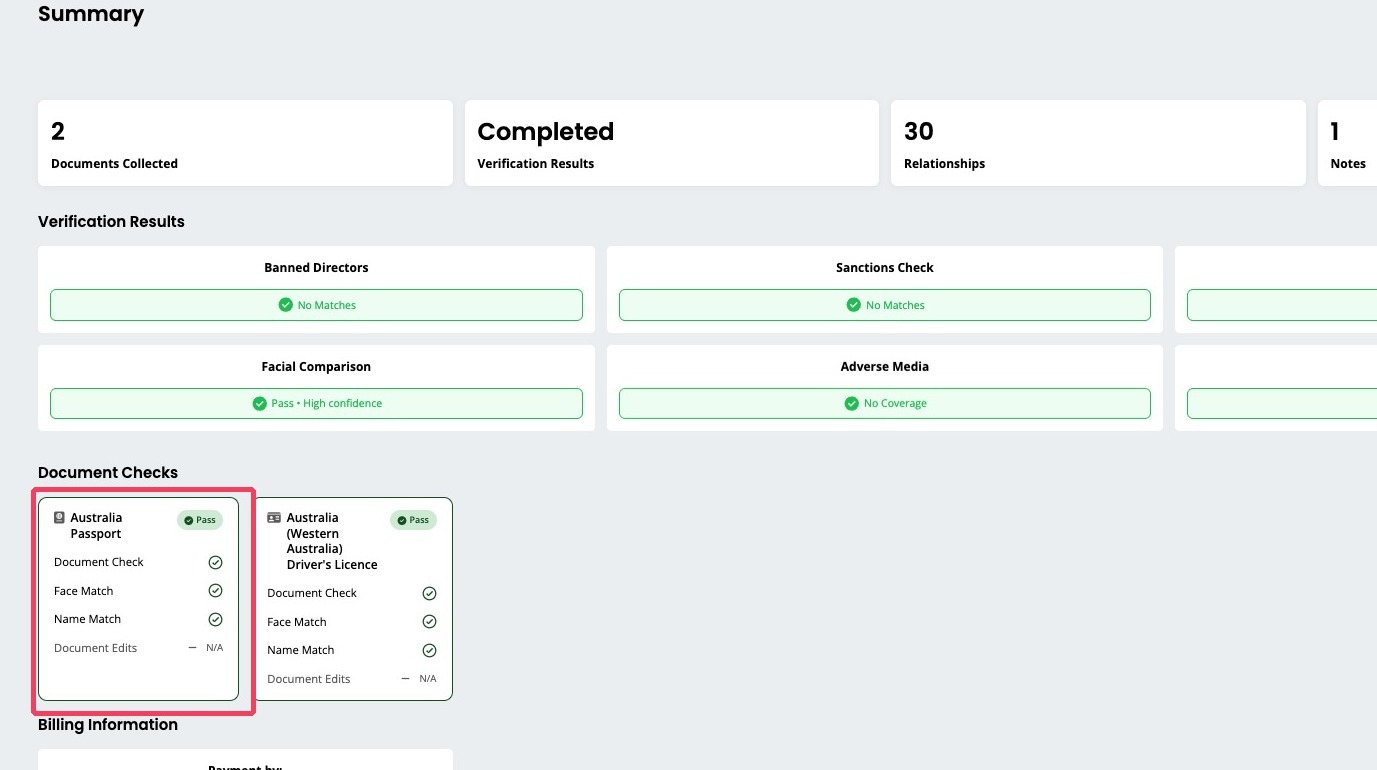
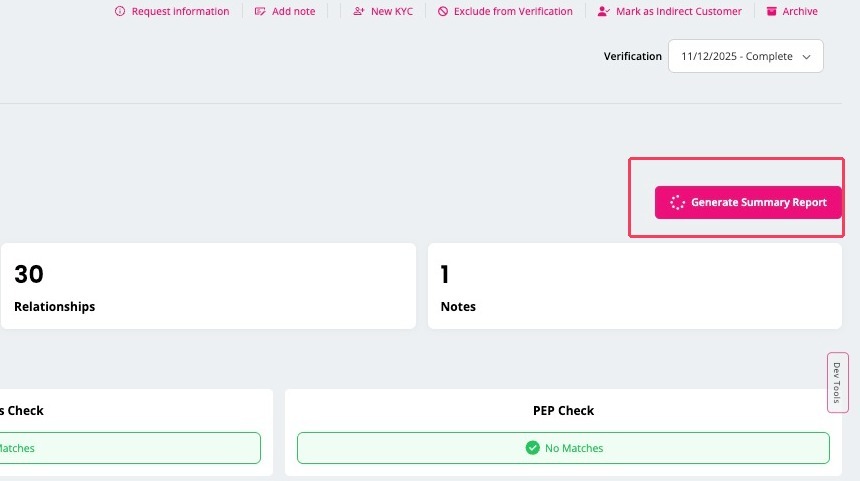
10. Once the record is complete and there are no actions to be reviewed, produce an output of the review by clicking Generate Summary Report. This compiles the identity, screening and evidence outcomes into a single downloadable report for your file.
Identity verification
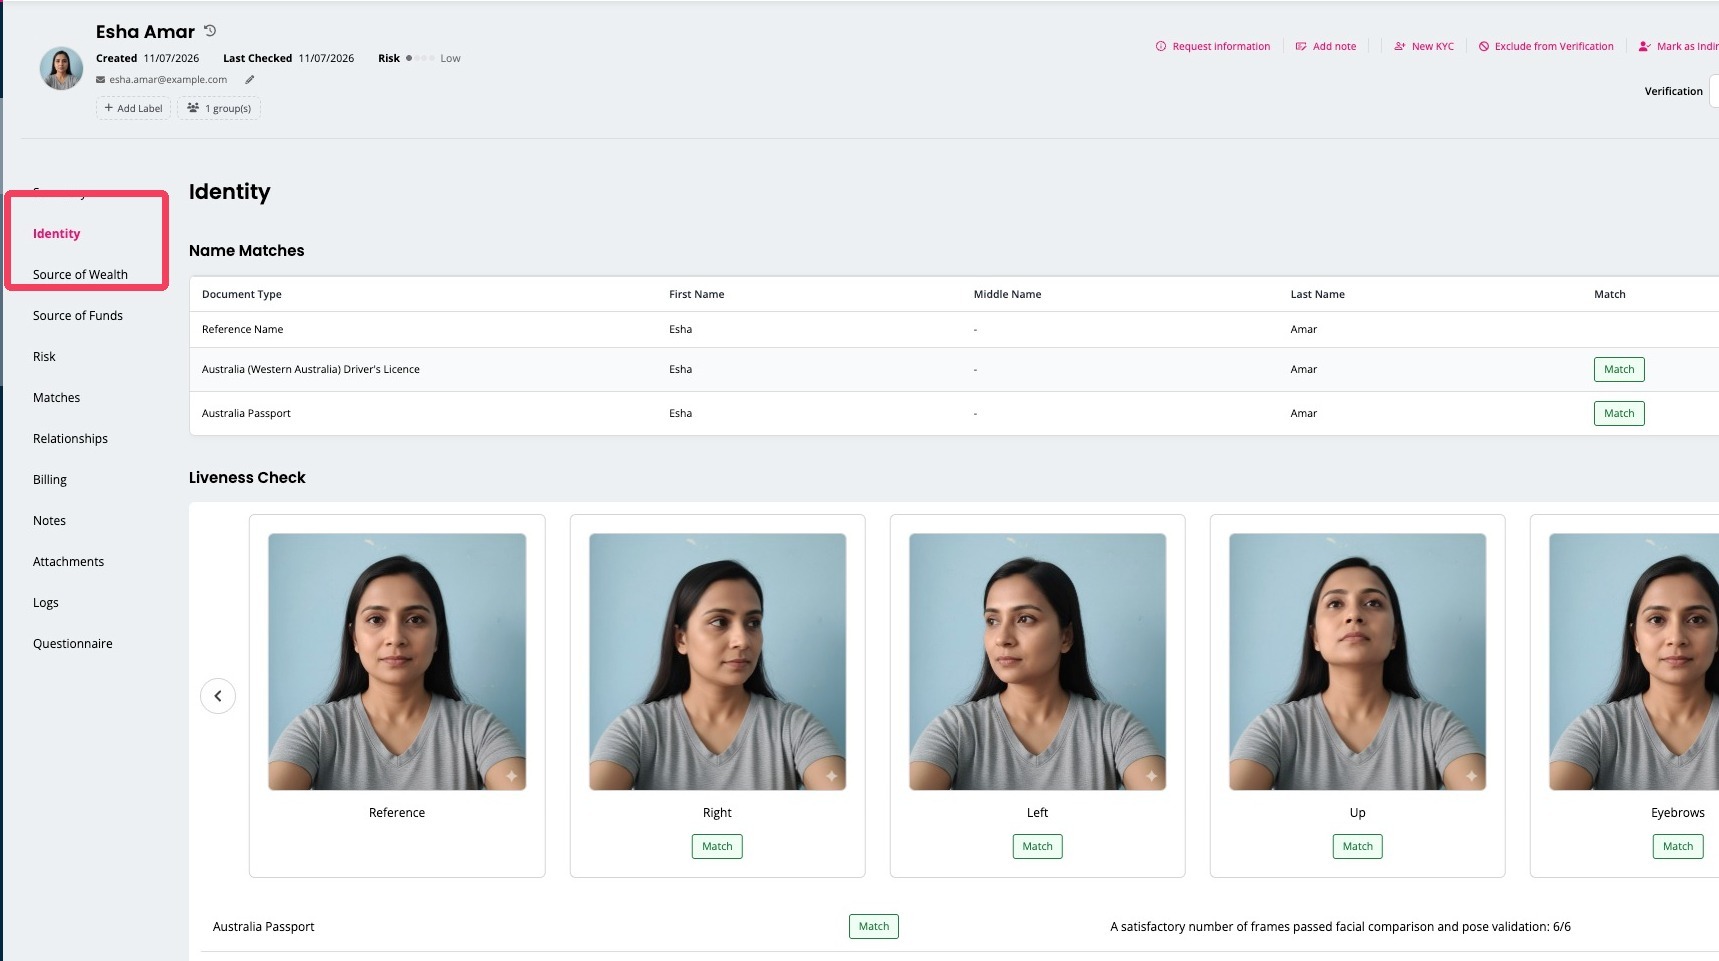
11. Open the Identity tab. This shows the Name Matches table - the reference name checked against each document captured (e.g. driver's licence and passport) - and the Liveness Check selfie frames from the VOI. Review these to confirm the person who verified is the person on the documents.
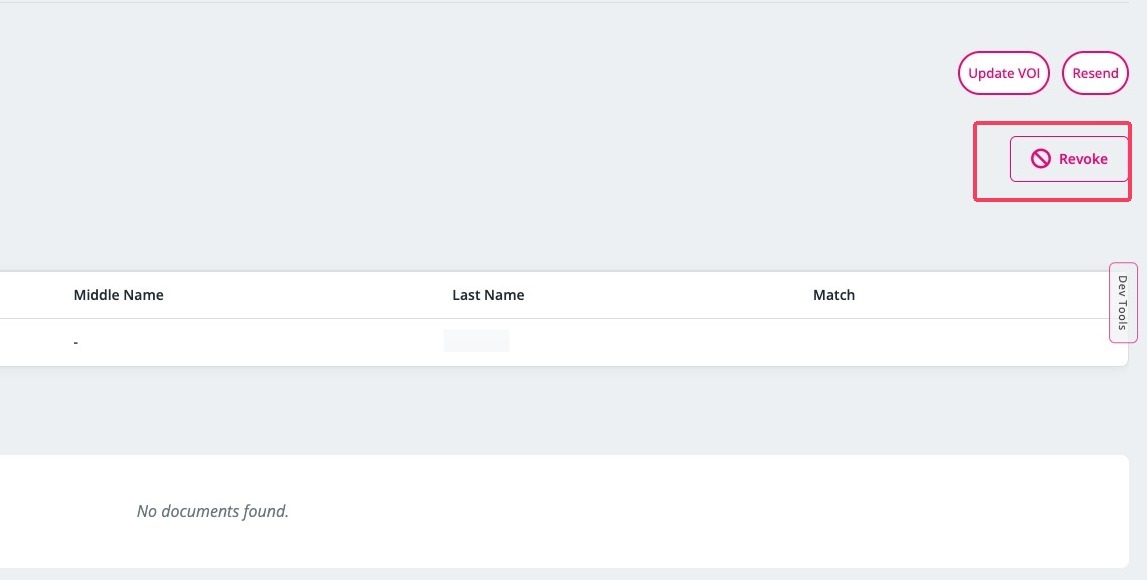
12. If you have sent a KYC request in error, you can Revoke it. Revoke is only available while the client hasn't started providing information.
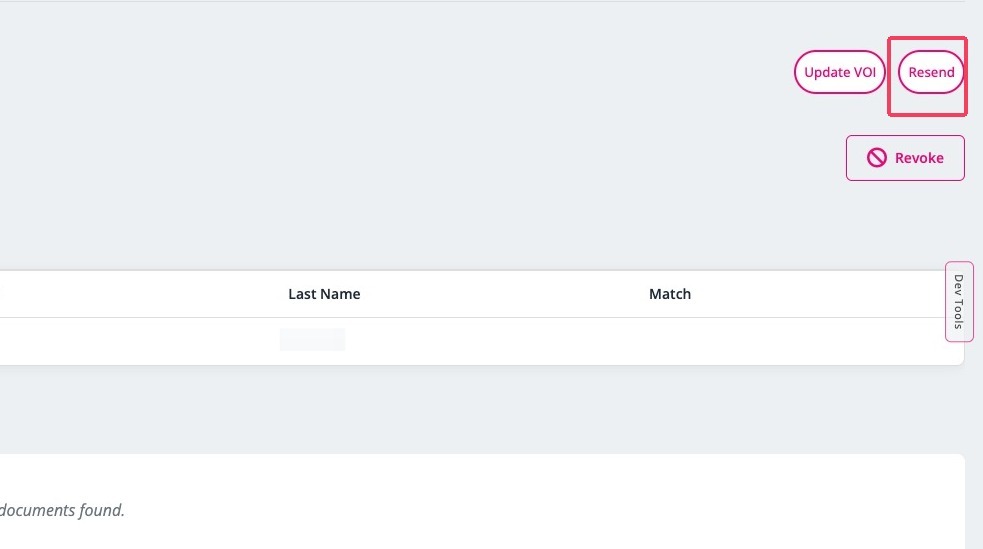
13. If a client says they haven't received (or has deleted) a KYC link, resend it to the mobile number provided by clicking Resend.
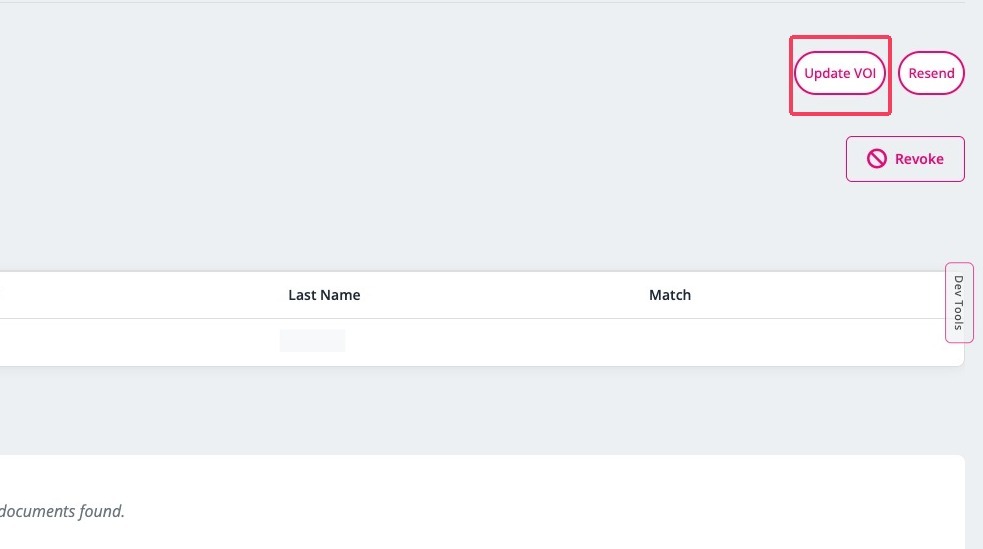
14. If a request was sent to the wrong name, mobile number or email, update and resend it via the Update VOI button.
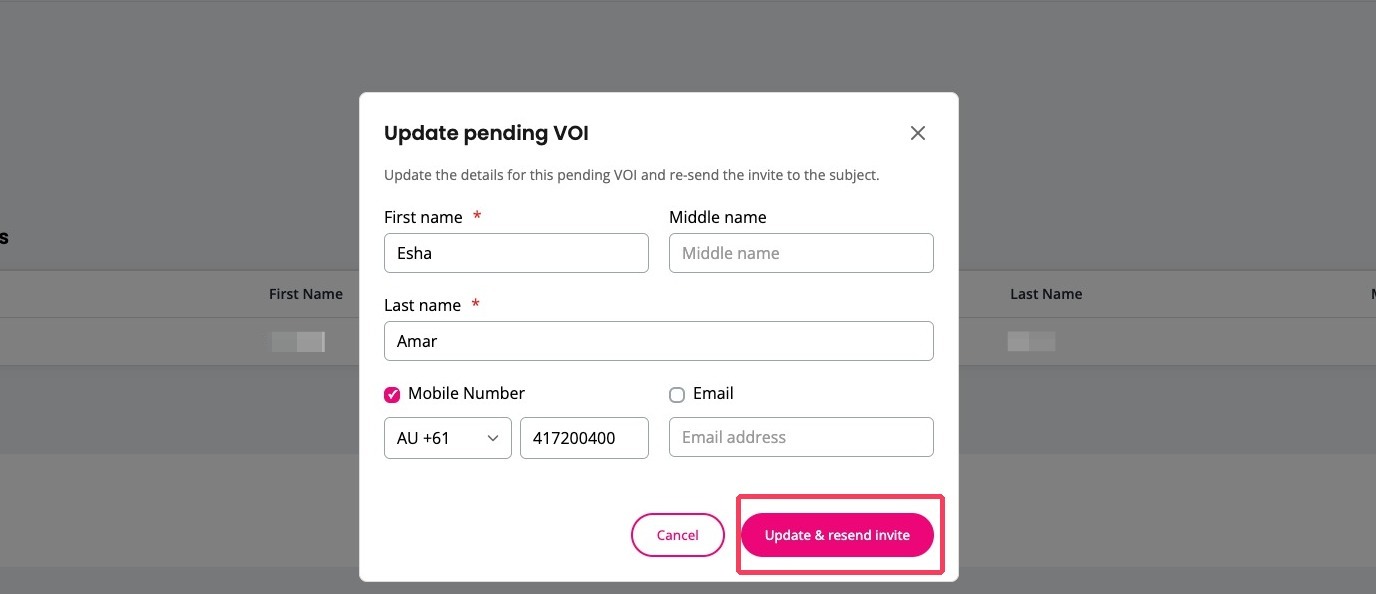
15. Edit the name(s), mobile number and email address, then click Update & resend invite. The button can only be clicked once you have made a change.
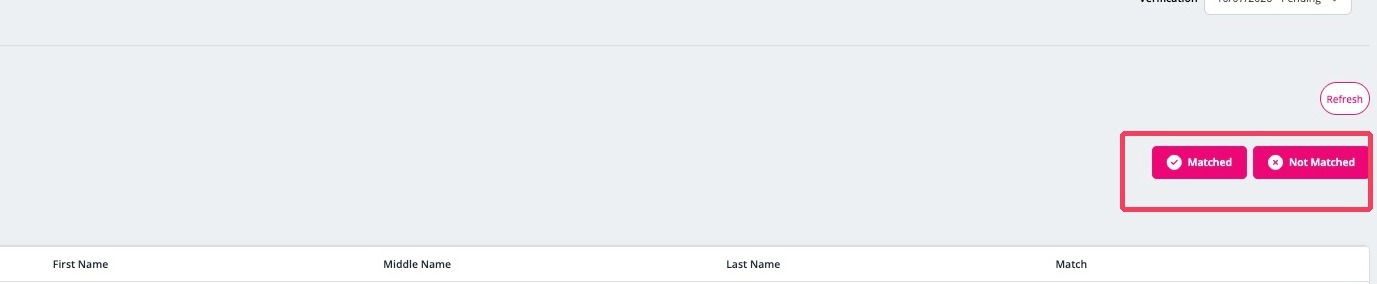
16. Where checks haven't fully passed, easyAML prompts a Match Individual decision. Review the issue noted, then decide whether the individual is Matched or Not Matched - the system will ask you to record a reason before proceeding.
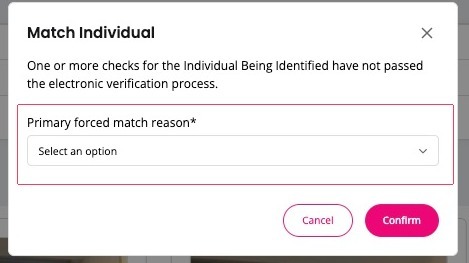
17. Open the Primary forced match reason dropdown and select the reason that applies.
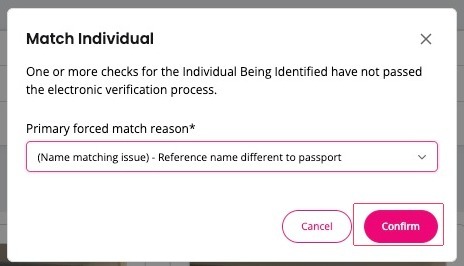
18. Choose the appropriate reason - for example "(Name matching issue) – Reference name different to passport" - then click Confirm. This records a manual (forced) match with a documented justification, preserving the audit trail for why the individual was accepted despite the electronic result.
Enhanced CDD - Source of Funds / Wealth
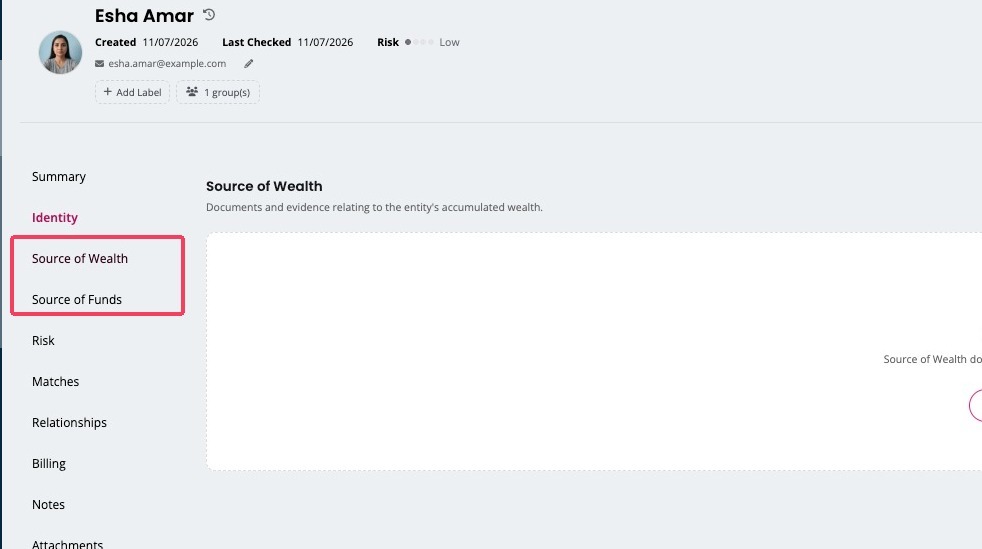
19. Open the Source of Wealth or Source of Funds tab. Where no previous request has been sent or collected yet, you'll see "No documents yet" with a prompt to request it.
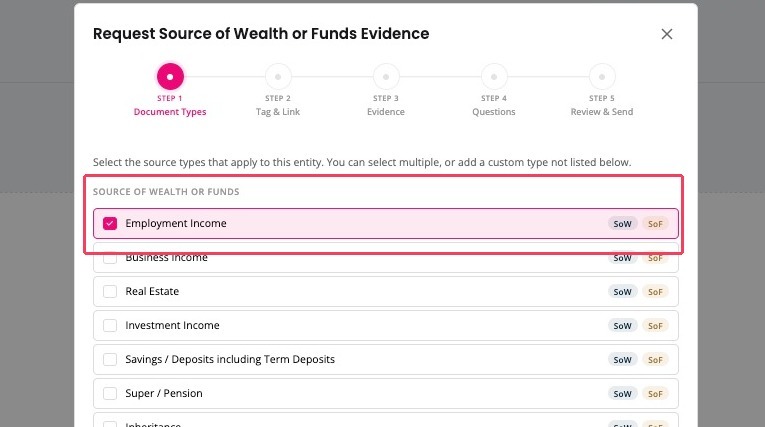
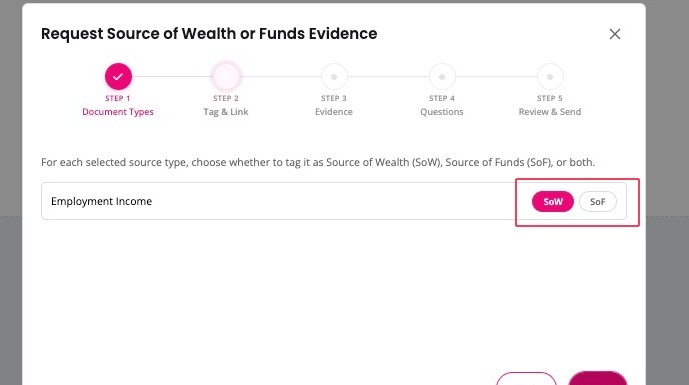
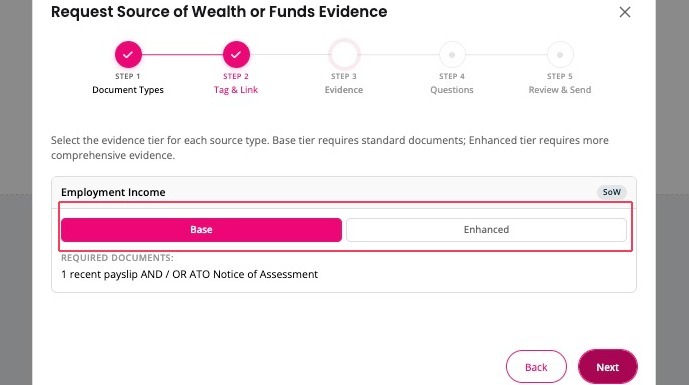
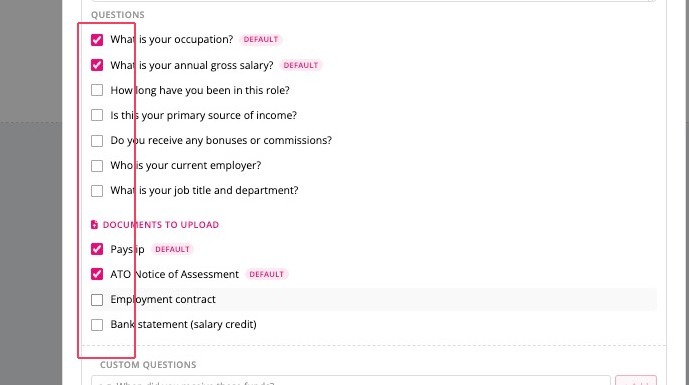
20. Click Request documents to launch the Request Source of Wealth or Funds Evidence wizard, then work through it:
- ① Document Types - select the source(s) that apply
- ② Tag & Link - tag each as Source of Wealth, Source of Funds, or both
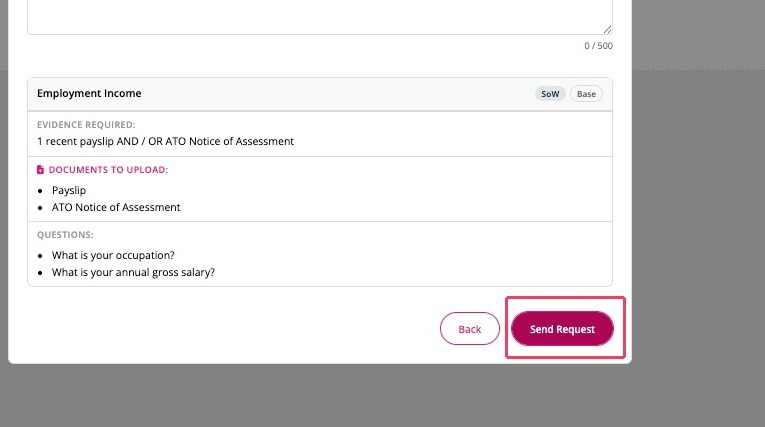
- ③ Evidence - choose the Base or Enhanced tier and confirm the required documents
- ④ Questions - review the questions the individual should answer and any documents to upload
- ⑤ Review & Send - add an optional message and click Send Request. The request goes to the individual and the response lands back in this tab.
Risk matches - sanctions, PEPs, adverse media
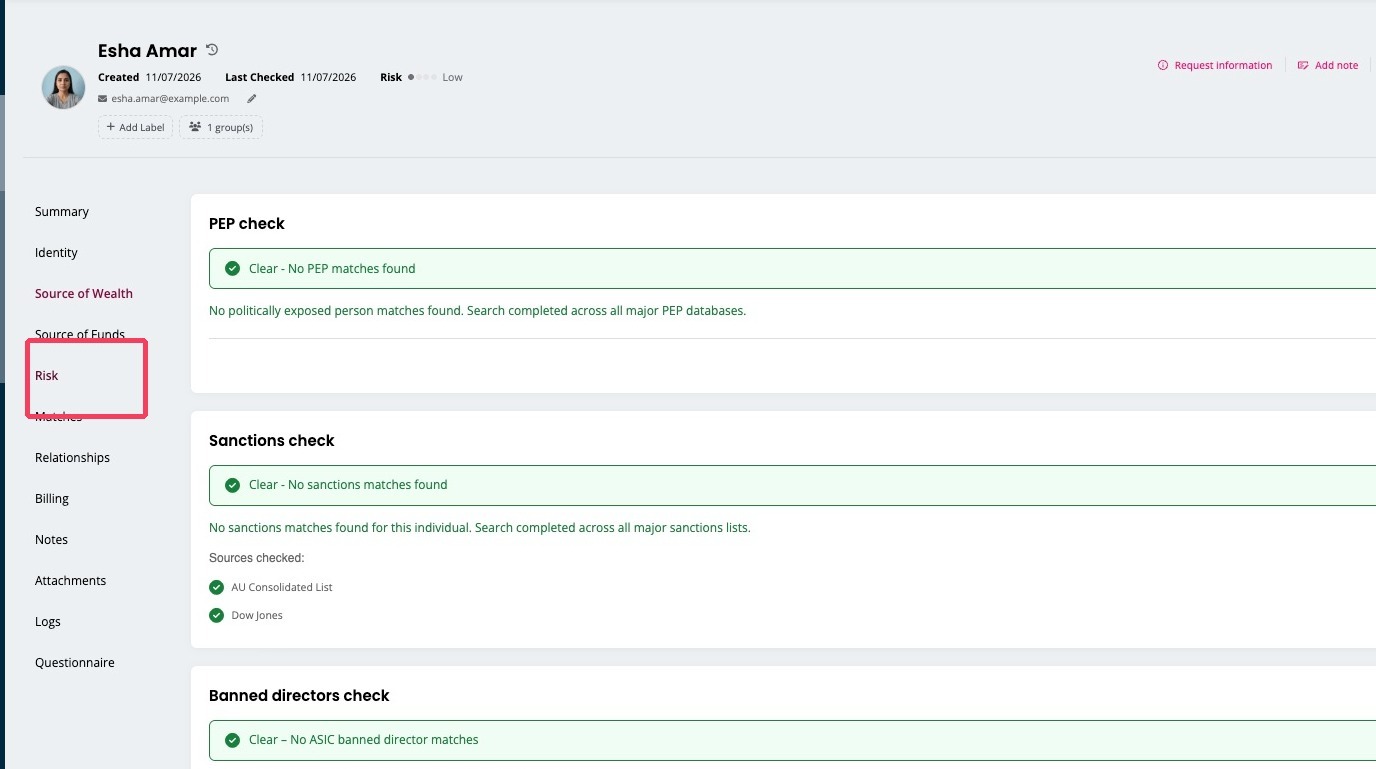
21. Open the Risk tab to review the screening outcomes in full - PEP check, Sanctions check and Banned Directors check - each showing its status and the sources searched. This is where you evidence that screening was completed across the major databases.
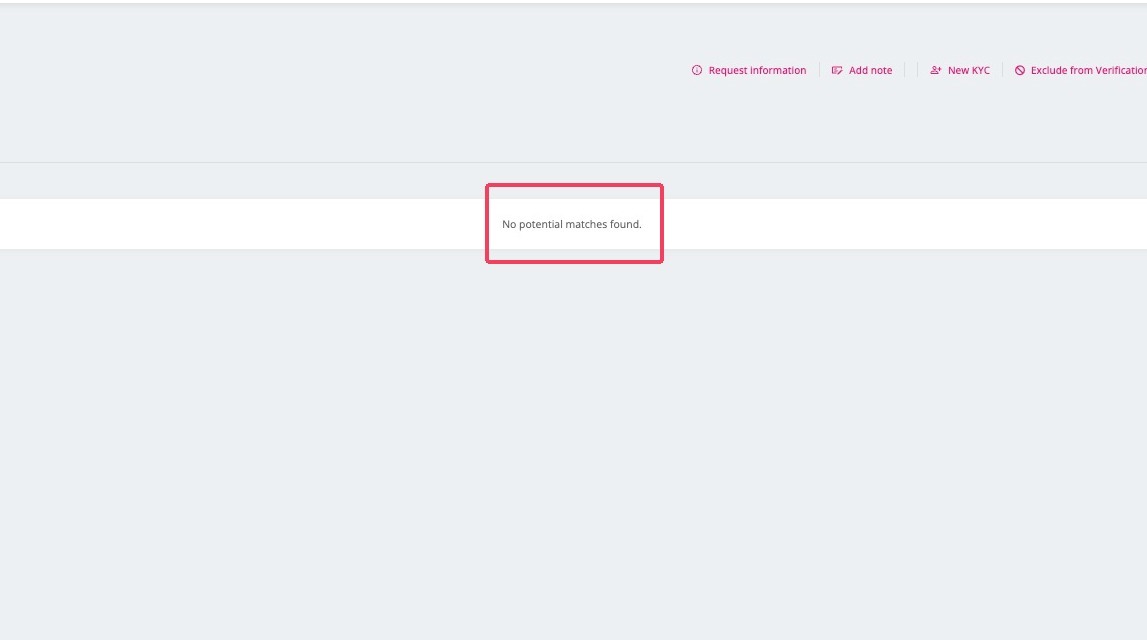
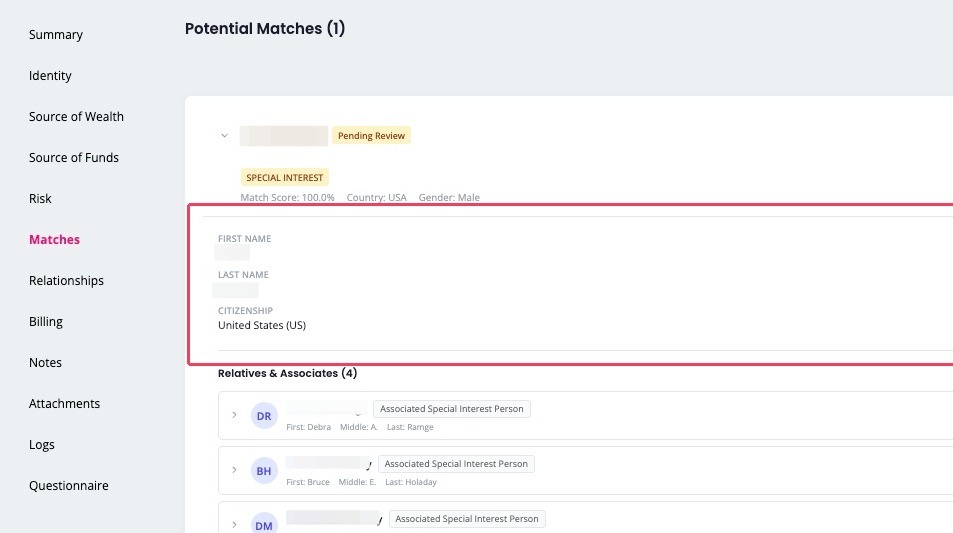
22. Open the Matches tab. If screening returned nothing, you'll see "No potential matches found."
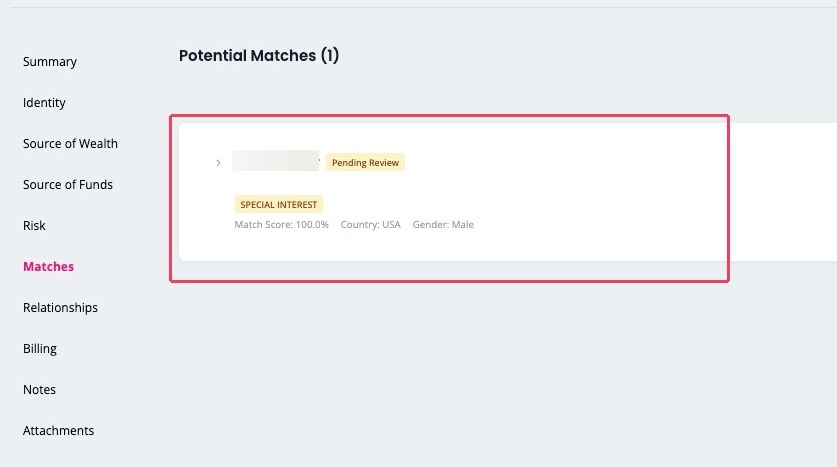
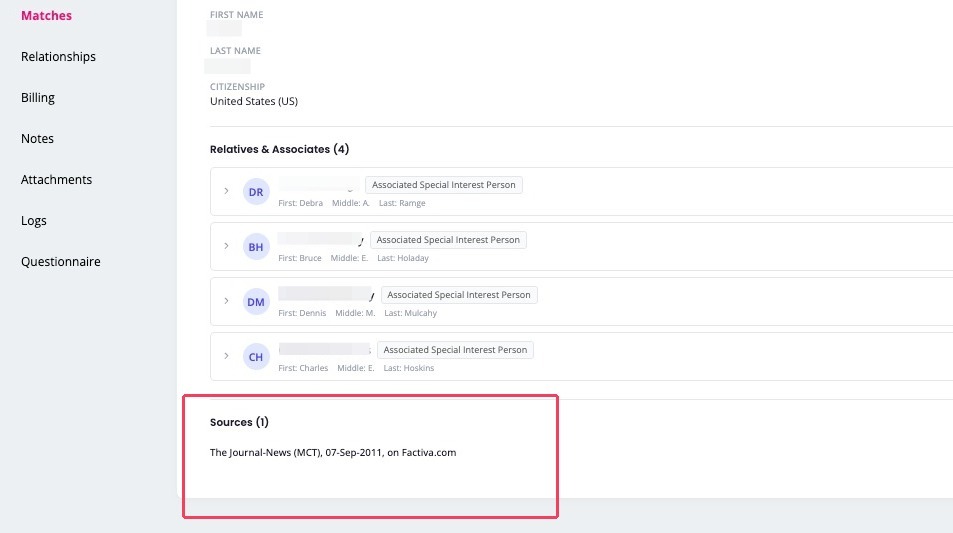
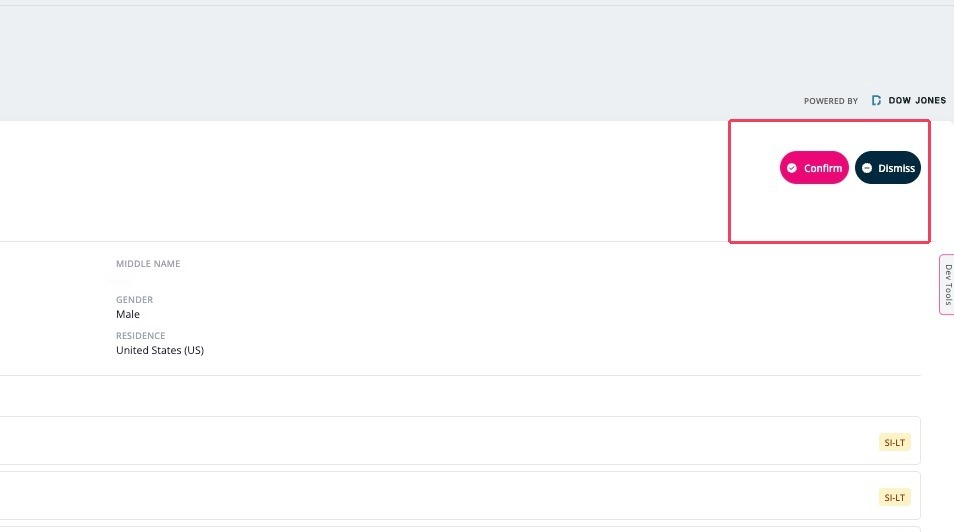
23. Where a potential match exists, open it to adjudicate. Review the match detail - name, date of birth, nationality, listed Entities & Associations, and Sources - then Confirm it as a true match or Dismiss it as a false positive. Recording this decision here keeps your screening disposition auditable.
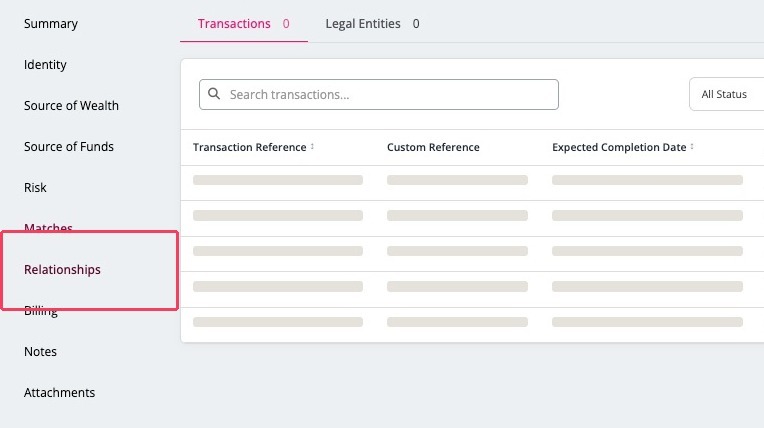
24. Open the Relationships tab to see how this individual connects to your business - the Transactions they're tagged to and any Legal Entities they're linked to.
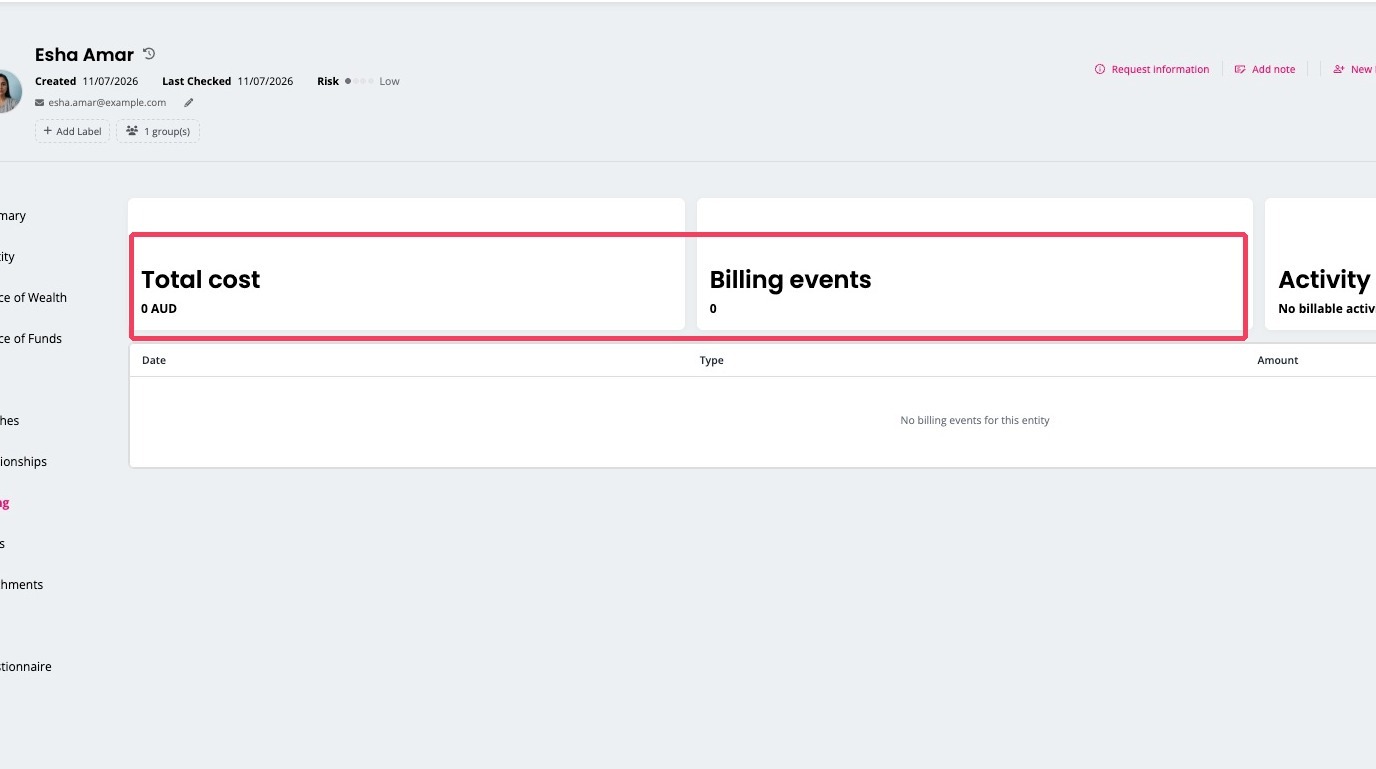
25. Open the Billing tab for a record of costs attributed to your business for this individual - total cost and any billing events. If you set the KYC request to Invoice my Company, you will see cost and billing-event figures here; if you chose Collect Payment from Client, this will show $0 cost and no billing event.
Notes, logs, attachments & questionnaires
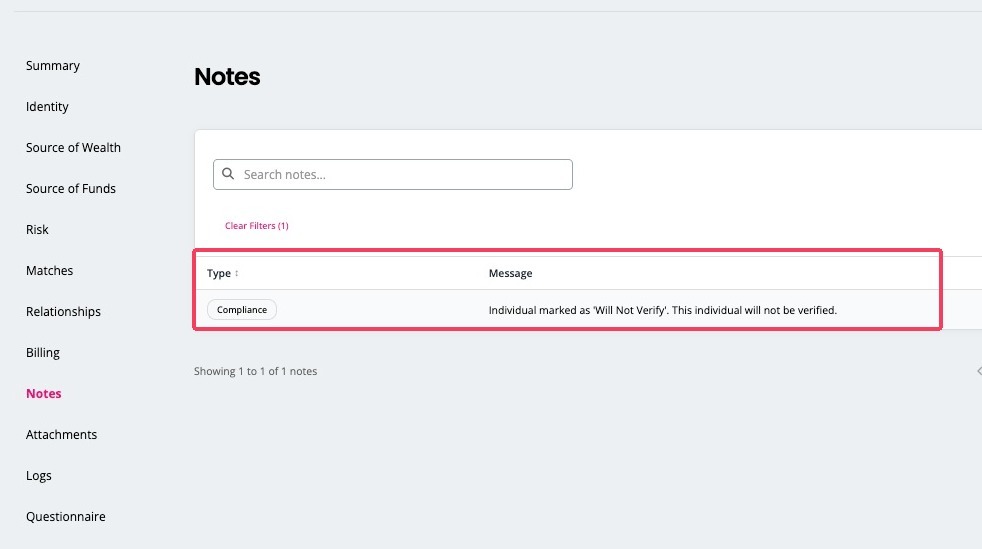
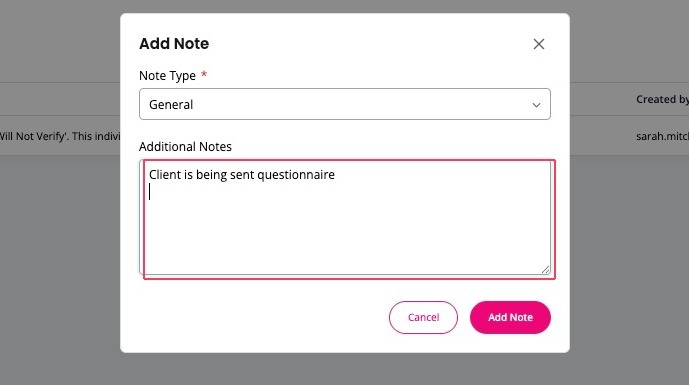
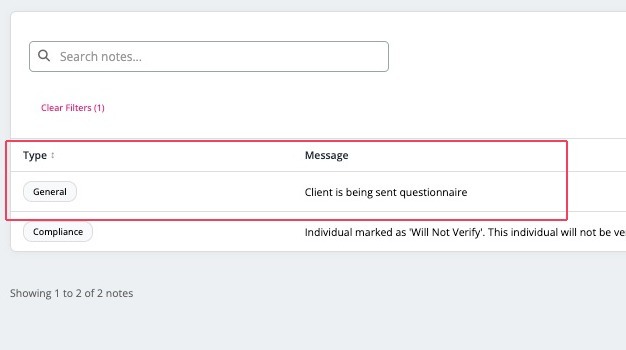
26. Open the Notes tab. Existing notes are listed with their type, message, author and timestamp - the narrative history of the review. Click Add Note to record a new one: choose a Note Type (e.g. General or Compliance), enter your note (e.g. "Client is being sent questionnaire"), and click Add Note. It's saved to the record with your name and the date/time for the audit trail.
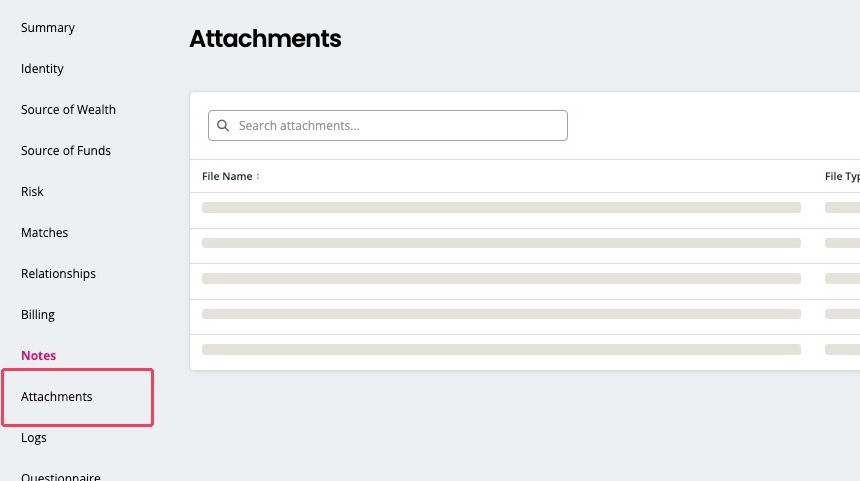
27. Open the Attachments tab to view and search every document held against the record in one place.
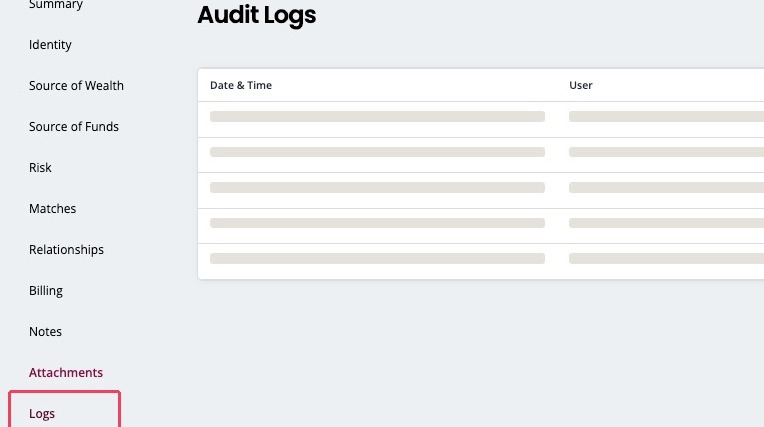
28. Open the Logs tab for the full activity log - date/time, user, and action - evidencing everything done on the record.
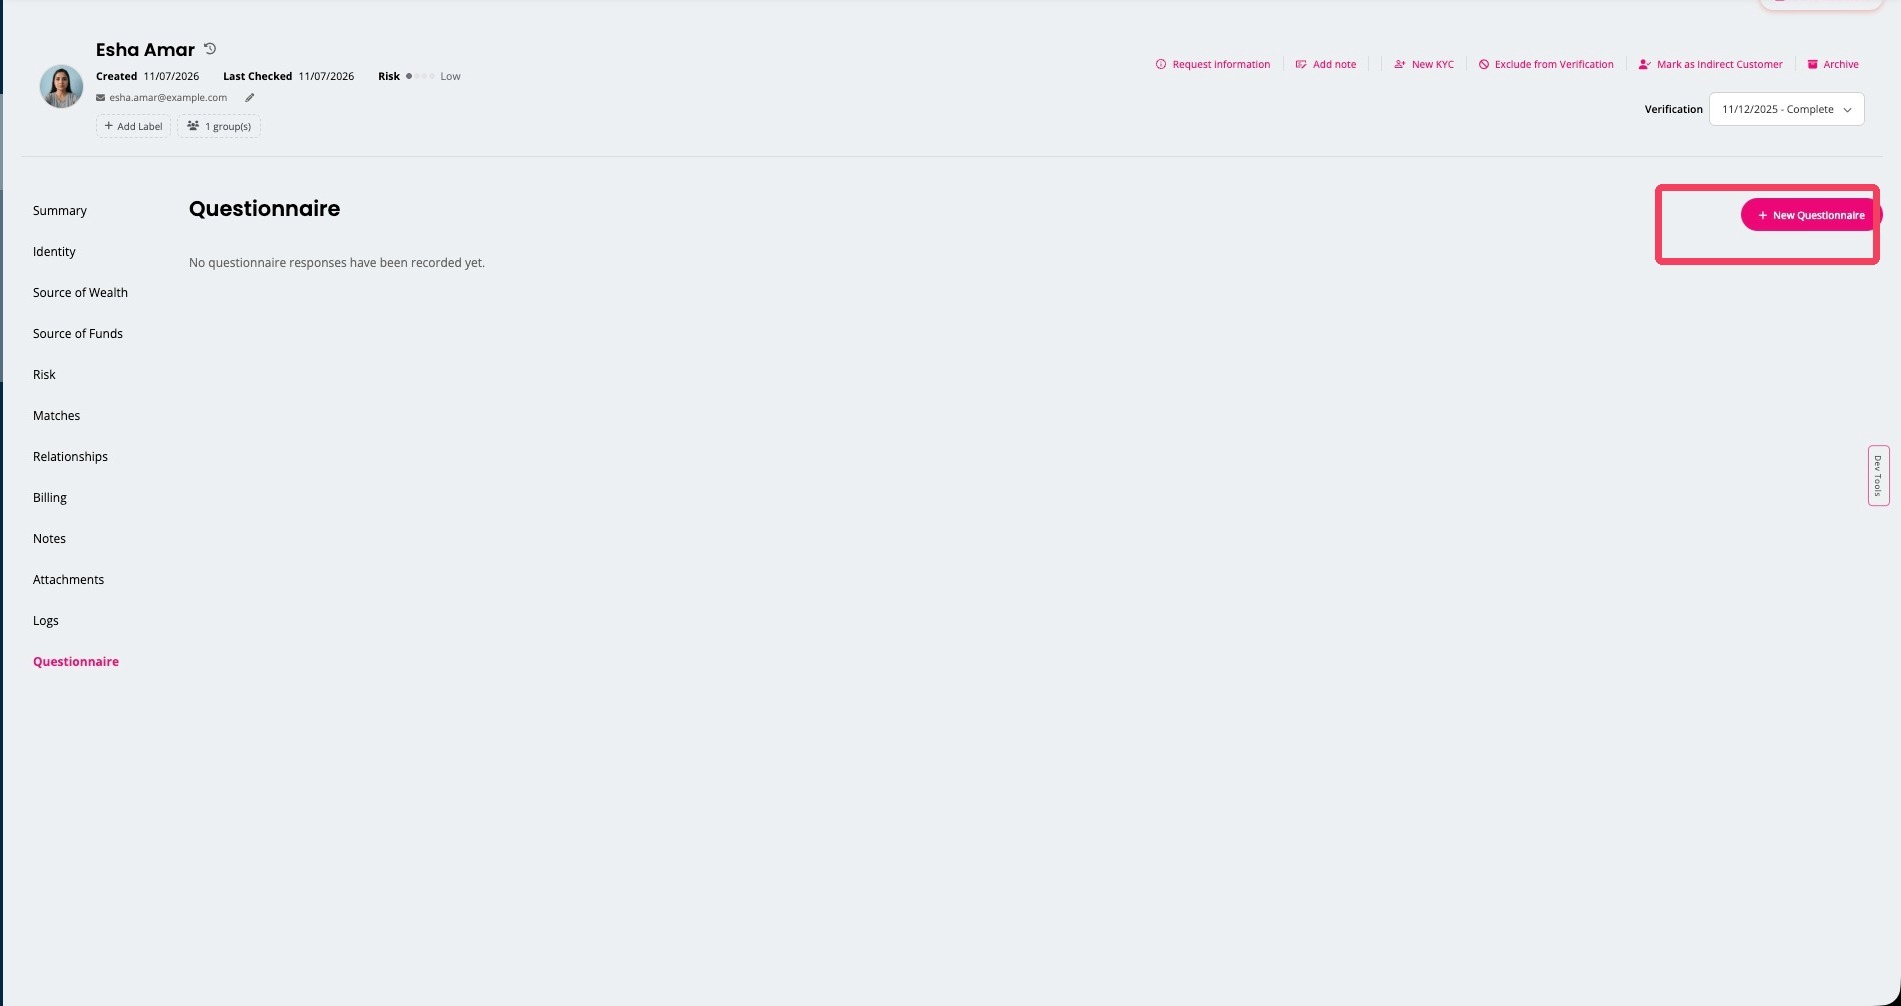
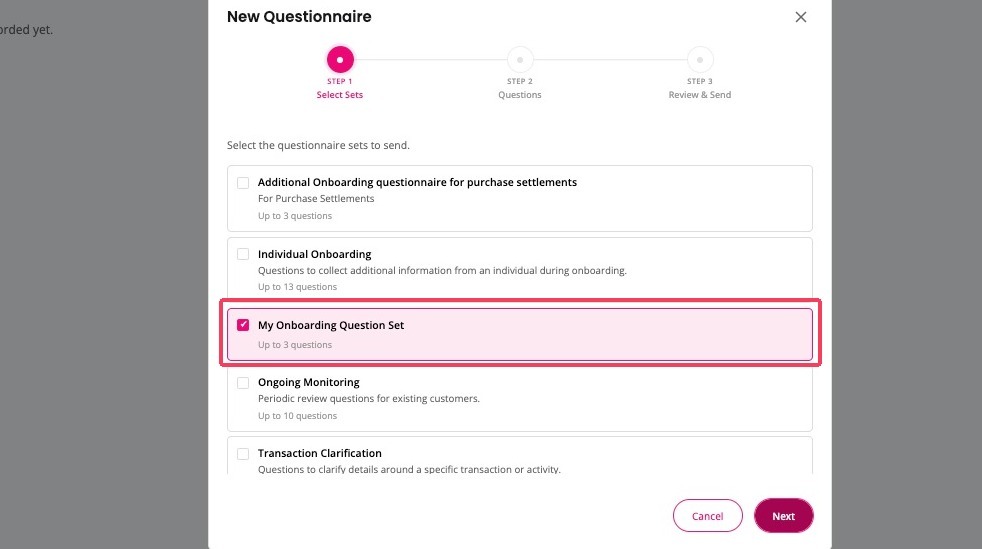
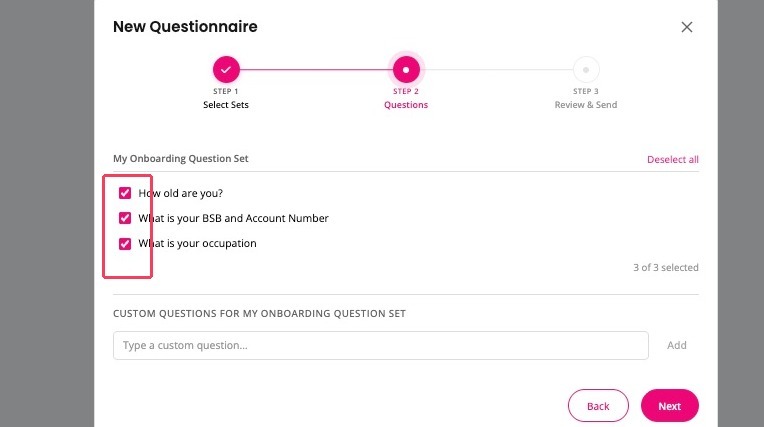
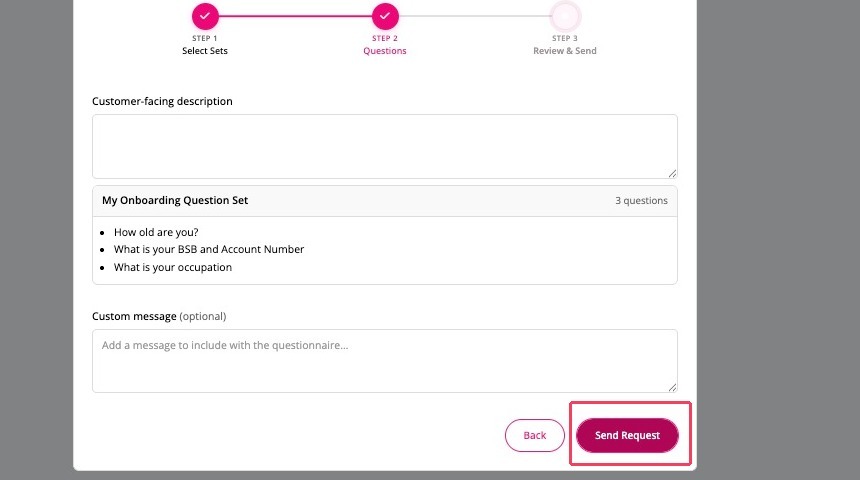
29. Open the Questionnaire tab to view issued and completed questionnaires. Click New Questionnaire to send one, and work through the wizard:
- ① Select Sets - choose a question set (e.g. My Onboarding Question Set)
- ② Questions - select or deselect questions and add any custom ones
- ③ Review & Send - add an optional customer-facing description and message, then click Send Request to issue it to the individual.
Open this area of the platform directly: Individuals